Reading datasheets for fun and profit, or how I learned to stop worrying and convert analog signals into elixir terms.
Watering My Plants
I want to have a plant on my desk at work, but each time I bring one to the office it promptly dies. Technology is clearly the solution to my problem. I need to be told when to water my plants, or even better, have them water themselves. We’ll start with a soil moisture sensor.
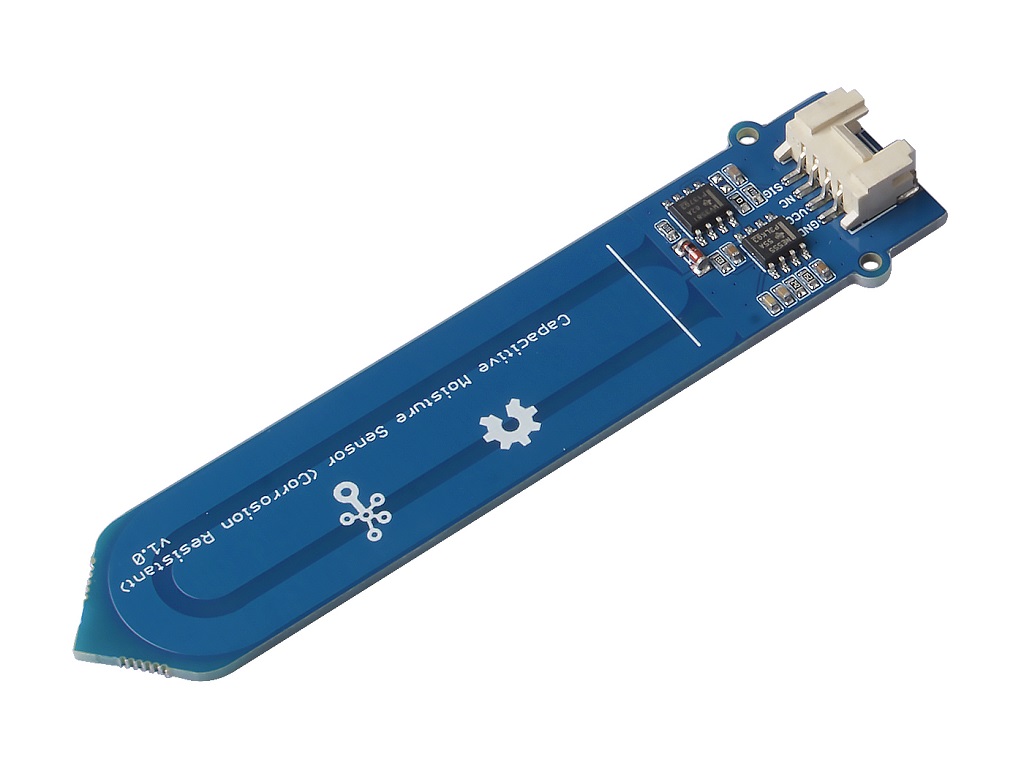
Photo courtesy of http://wiki.seeedstudio.com/Grove-Capacitive_Moisture_Sensor-Corrosion-Resistant/
Analog Sensors
This sensor has 3 wires.
GND and VCC provide power to the device and the SIG wire will carry a voltage between 0 and 3 volts depending on how much moisture is around the sensor.
This is known as an analog interface and is a very simple concept, but if you are using a raspberry pi, it turns out to be a a little tricky to read that value.
All of the pins on the raspberry pi are digital pins meaning that they can only be read as 0 or 1 depending on whether the voltage is closer to 0 or 3.3 volts.
We will need something that converts the analog signal into a digital signal that the raspberry pi can read.
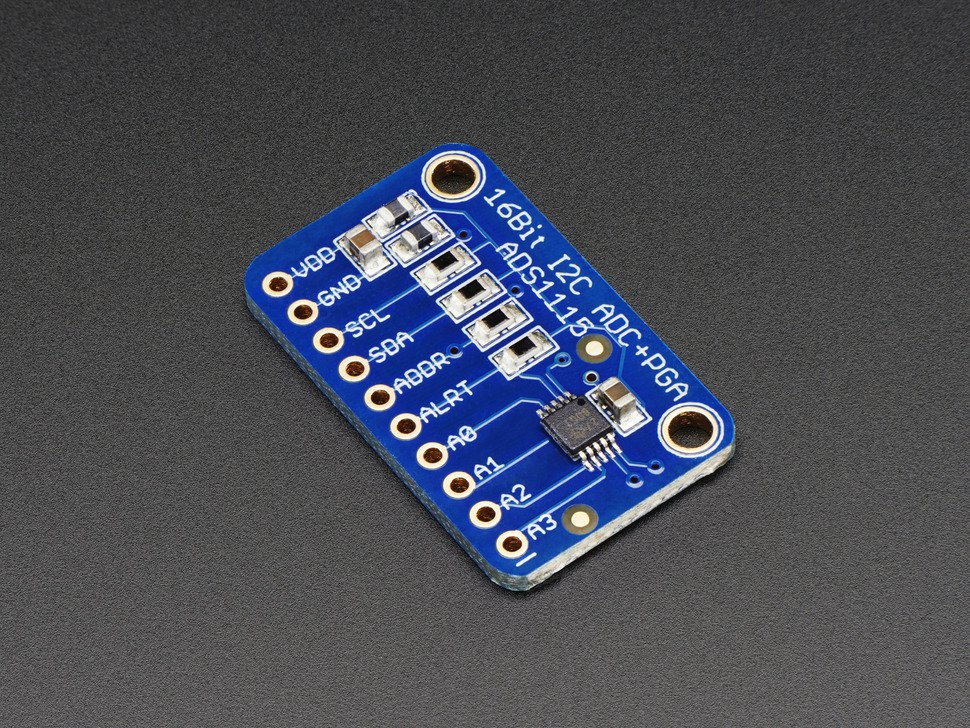
Photo courtesy of https://www.adafruit.com/product/1085
Analog to Digital
Analog to digital converters take in an analog signal like the 0-3 volt signal described above, and turn it into a digital signal.
I’m using an ADS1115 chip which uses an i²c interface so that you can read 4 different analog signals with just one pair of wires.
This allows you to read each of the analog signals as a 2-byte value, a number between -32,768 and 32,767.
The raspberry pi has built-in support for talking to I2C devices, so this is a great option for my use-case.
Eye to See
The I2C protocol allows you to have multiple devices connected to the same pair of wires that act as a message bus. The raspberry pi acts as a master, meaning that it initiates communication. Each device on the bus has an address, and you always use that address when sending or receiving data.
Because the protocol is so basic, many devices implement a register-based protocol. Each time you want to send a message to the device, you send a first byte that identifies which register you are writing to and the rest of the bytes are the information you want to write into that register. If you want to ask for some information you write 1 byte to identify what you are asking about, and then you read a certain number of bytes from that address to get the data you want.
Checking the Soil
The first thing we’ll do is check the configuration of the device. To do this well send 1 byte telling the chip which register we want to sent and then read back 2 bytes (the size of the configuration register).
{:ok, bus} = Circuits.I2C.open("i2c-1")
:ok = Circuits.I2C.write(bus, 72, <<1>>)
{:ok, <<133, 131>>} = Circuits.I2C.read(bus, 72, 2)
# I2C also has a convenience method for this
{:ok, <<133, 131>>} = Circuits.I2C.write_read(bus, 72, <<1>>, 2)
We’re getting back some data, but what do those bytes mean? We’ll need to take a look at the datasheet for the ADS1115 chip. These 16 bits of data tell us 9 different things about how the chip is currently operating. That’s a lot of information packed into the space of just two ascii characters.
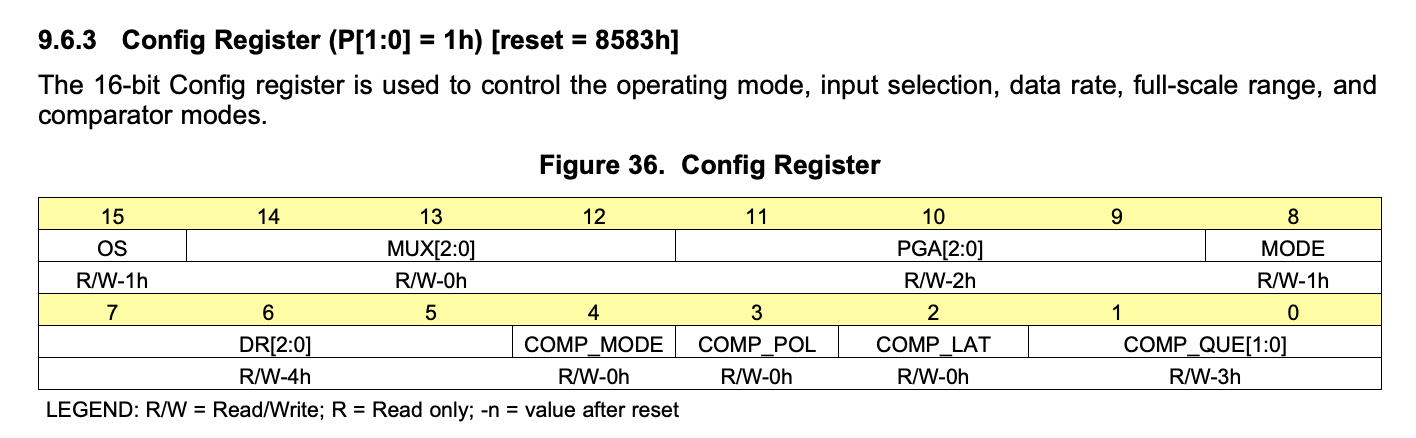
Luckily, we can use Elixir’s binary pattern matching syntax to pull out this information. Binary pattern matching allows us to ask for information by expressing how we expect the information to be laid out across the bytes. No bit-shifting required.
<< status::size(1), mux::size(3), _other_stuff::size(12) >> = <<133, 131>>
We can also similarly build a new binary to write new configuration to the register.
config_bytes = << status::size(1), mux::size(3), other_stuff::size(12) >>
config_register = 1
Circuits.I2C.write(bus, 72, <<config_register, config_bytes::binary>>)
Sharing What We’ve Learned
The binary pattern matching syntax is really helpful for parsing binary data, but learning which bits do which things still requires some squinting and a datasheet. So I went ahead and published the ADS1115 package on hex.pm so that other people can deal with a struct of config data.
{:ok, bus} = Circuits.I2C.open("i2c-1")
ADS1115.config(bus, 72)
=> {:ok, %ADS1115.Config{
  performing_conversion: false,
  mux: {:ain0, :ain1},
  gain: 2048,
  mode: :single_shot,
  data_rate: 128,
  comp_mode: :traditional,
  comp_polarity: :active_low,
  comp_latch: false,
  comp_queue: :disabled
}}
The package also gives you an easy way to read the sensor. Now I’m ready to check my soil moisture sensors.
Will This Plant Live?
Technology is no guarantee of success, but this is the best chance I have at keeping a plant alive. I’ll be doing some basic experiments around how much moisture different plants need and whether they like to have dry cycles, but here’s a simplistic example of to monitor and water a plant.
defmodule Seedling do
  use GenServer

  @a2d_addr 72 # the address of our ADS1115 analog to digital converter
  @check_interval 1_000 # wait 1000ms between checking the sensor
  @pump_control_pin 4 # the GPIO pin we are using to control our water pump
  @sensor_threshold 23_989 # a little experimenting showed that I get this reading or lower when soil is wet

  def init do
    {:ok, bus} = Circuits.I2C.open("i2c-1")
    {:ok, pump} = Circuits.GPIO.open(@pump_control_pin, :output, initial_value: 0)
    {:ok, {bus, pump}, @check_interval} # check the moisture in 1 second
  end

  def handle_info(:timeout, {bus, pump}) do
    {:ok, reading} = ADS1115.read(bus, @a2d_addr, {:ain0, :gnd})
    if reading > @sensor_threshold do
      Circuits.GPIO.write(pump, 1) # turn on the pump to get more water
      # Note: what happens if the sensor is un-plugged, or malfunctions, or gets moved?
      # You should probably limit the maximum amount of water you can pump in, but this
      # should work for testing outside.
    else
      Circuits.GPIO.write(pump, 0) # turn off the pump, we got enough water
    end
    {:noreply, {bus, pump}, @check_interval}
  end
end